Product Description
(ALL F3 / RT / Canyon Models)
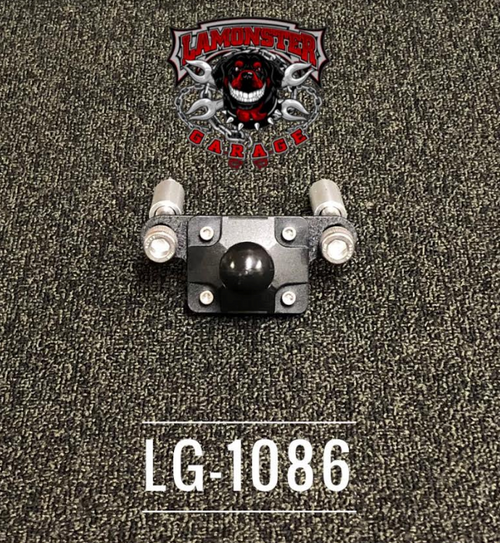
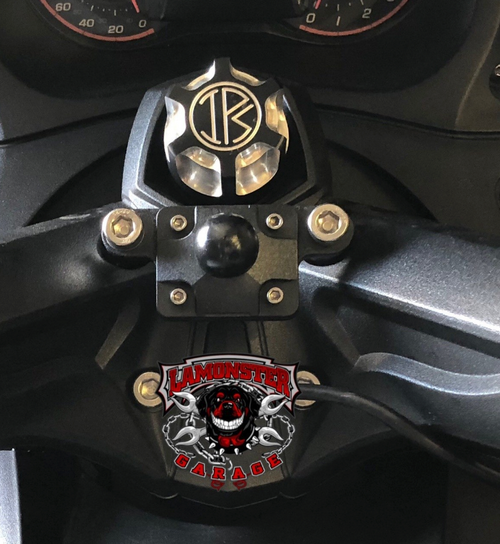
THE ALL NEW LAMONSTER® MOUNT 2.0
This is a center handlebar mount Lamonster® Mount Plate with many options as you have become a custom to seeing here at Lamonster Garage.
This kit includes: Lamonster® Mount Plate 2.0, 1 - 1" Ram Ball, 1 X USB power plate, 1 x 12v plug power plate, 2 x bolts, 2 x bushings for mounting.
There is also a standard X-Grip or LRG X-Grip option at bottom of this page.
Cradle Dimensions, Standard X-Grip
Minimum Width = 1.875" (Minimum Height = 4.25")
Maximum Width = 3.25" (Minimum Height = 2.25")
Depth = 0.875"

Compatible Devices
- Google Pixel
- Motorolla X Droid
- Apple iPhone X
- Apple iPhone 8
- Apple iPhone 7
- Apple iPhone SE
- Apple iPhone 6
- Apple iPhone 5s
- Apple iPhone 5c
- Apple iPhone 5
- Apple iPod touch (All Models)
Cradle Dimensions
Minimum Width = 1.75" (Minimum Height = 5.5")
Maximum Width = 4.5" (Minimum Height = 3.25")
Depth = 0.875"

Compatible Devices
- Google Pixel XL
- Apple iPhone 8 Plus
- Apple iPhone 7 & Plus
- Apple iPhone 6/6s & Plus
- Nexus 6
- Nexus 5
- Samsung Galaxy S7
- Samsung Galaxy S6
- Samsung Galaxy S5
- Samsung Galaxy Note 7
- Samsung Galaxy Note 4
- Samsung Galaxy Note 3


If you have any questions about this product email us at LamonsterGarageSales@gmail.com
WARNING: California Residents - www.p65warnings.ca.gov
Product Videos
Custom Field
Product Reviews
23 Reviews Hide Reviews Show Reviews
-
Dual Power Ports
Fit perfectly and was easy to install with their design.
-
Lamonster Mount 2.0 with Dual Power Plates
2020 RTL I like the 2.0 Mount. The mount is modest compared to others I've seen on ebay etc., it doesn't take much handlebar real estate. I'm not big on cluttering handlebars, but don't mind this mount too much. The convenience of the power ports outweighs the cluttered bar. Be aware, when you pull the handlebar riser bolts, the handlebar will move with any slight pressure on the grips or whatever. You might place an indexing mark on the bars prior to removing the riser bolts if you wish to maintain bar position. Another thing I like is this power point connects directly to the battery, some competitor mounts do not. I like that because the battery tender can connect through the lighter port for keeping the battery up. Also, on the 2020+ Spyder, you'll need to utilize the long spacers.
-
Dual power plates
Wasn’t a bad install. Took about 4 hrs. Videos helped a lot! Nice to have power were it is needeid.
-
Very satisfied
Makes everything more convenient. So happy with everything I've ordered for my spyder
-
Monster Mount 2.0 with Dual Power Plates
Easy to install, even for a 60-something year old gal with the aid of Mr. YouTube. Now I can use my heated gear when needed and trickle charge my battery using the same 12V outlet. The USB outlets are a bonus for me. I mainly wanted easy access for heated gear and battery maintenance. I have a 2016 RT and this sits perfectly without blocking my dash view.
-
Lamonster Mount 2.0 with dual power plates
This is awesome. This is a must have.
-
Good product
I had it installed at the Lamonster Garage. It is exactly what I have been looking for my bike. I can have more devices plugged in especially for long distance trips.
-
2.0 dual power plates
straight forward install...had the single power plate before but this one gives both the usb and the 12v up front.
-
2015 RT Phone Mount with Dual Power Plates
For 2 years we relied on the 12v outlet in the trunk to recharge our cell phones while I searched and saved for a phone holder and power module. We also use our phone for GPS and this can be problematic, so after 2 years I finally purchased the dual power mount with the 2.0 phone holder. I give this product only 4 stars as there was no instructions in the package which arrived within 3 days. I had to search for a video on YouTube. It took me watching 4 videos before finding the correct one and it was somewhat in complete ad it did not include how to remove panels. Luckily I had some idea after having a Spyder rider help me change oil the last time. Overall the install was about 4 hours total time. The 2 power mounts are a very tight fit. But they look great once installed. To get the positioned correctly (caps are straight up and down), you need to loosely put them on and align them. To tighten them to the bracket, I used a flathead screwdriver after tightening the new bolts which require a larger bit size than the original bolts. I brought the 2 wires down along the steering column and used a zip tie to hold the together. I then turned the steering wheel both directions many times to ensure I had the proper slack and the wires don’t get caught. I then ran the wires down to the battery and only had about 3 inches to trim the wires. I also zipped tied the wires in 2 different locations. If I had it to do over, I would trim the wires and connect them to the quick connect (very nice feature) after running them down along the steering wheel and zip tying them together. I would definitely recommend this product. Nice having the phone secure and being able to charge it.


